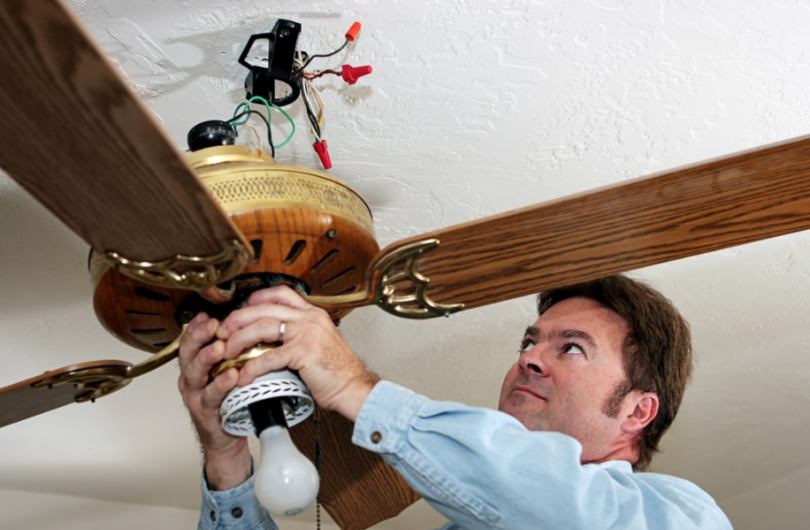
It is one of the most specific frustrations a homeowner can face: you click the remote, the fan blades begin to whirl perfectly, but the room remains in total darkness. When a remote control ceiling fan light is not working, it creates a confusing diagnostic puzzle. Because the fan motor is receiving power and responding to the transmitter, you know the circuit is “live,” yet the light kit—the most essential part for evening comfort—remains dead.
Nowadays, these issues are rarely caused by a “broken fan.” Instead, the failure usually lies in the handshake between the remote transmitter, the ceiling-mounted receiver, and the safety components hidden inside the light kit. This guide provides a 3,500-word deep dive into every possible failure point, from a simple dead battery to a scorched wattage limiter, ensuring you can restore your lighting without calling an expensive electrician.
Contents
Quick Answer: Why Your Fan Light Isn’t Turning On
If your ceiling fan motor works but the light does not, the problem is typically caused by one of the following:
- A Burned-out or Loose Bulb: The most common (and overlooked) cause.
- Remote/Receiver Desync: The receiver has “forgotten” the light command but retained the fan command.
- Wattage Limiter Failure: A safety device that has cut power to the light kit permanently.
- Faulty Receiver: The internal relay responsible for the light circuit has burned out.
- Loose Blue Wire: The specific wire responsible for light power has shaken loose in the canopy or switch cup.
Step-by-Step Troubleshooting
In order to solve this problem, you must work from the “outside in.” Do not start by tearing the fan off the ceiling. Start with the components you can touch without a ladder.
1. Check the Light Bulb First
It sounds elementary, but a significant percentage of “broken” remote lights are simply the result of a bulb that has failed or shaken loose due to the fan’s natural vibration.
The “Vibration Loosening” Phenomenon Ceiling fans are mechanical devices that produce constant micro-vibrations. Over months of operation, these vibrations can act like a slow-motion wrench, gradually unscrewing a bulb from its socket. If the bulb loses contact with the brass tab at the bottom of the socket, the circuit breaks.
Testing the Bulb Do not just look at the filament. Now most bulbs are LEDs, and you cannot see if they are “burnt” with a visual inspection.
- The Swap Test: Take a bulb you know works from a lamp and put it in the fan.
- Check for “Too Dim” Issues: If the bulb glows very faintly but won’t fully illuminate, the issue is likely your power supply. Read more about ceiling fan lights too dim.
2. Inspect the Light Socket
If a fresh bulb doesn’t work, the socket itself may be the culprit. Sockets are prone to two main issues: corrosion and “tab flattening.”
The Tab Trick Inside every light socket is a small brass tab. When you screw a bulb in too tightly, you can flatten this tab over time. Eventually, it no longer springs back to meet the base of the bulb.
- Turn off the power at the breaker.
- Use a small screwdriver to gently pry the brass tab up about 1/8th of an inch.
- Screw the bulb back in (snug, but not tight).
Corrosion and Heat Stress If you see black soot or white powdery corrosion inside the socket, the socket has “arced.” This can lead to a ceiling fan light flickering before it fails completely. If the socket is scorched, the entire light kit assembly usually needs to be replaced.
3. Check Remote Control Basics
Before blaming the fan’s “brain,” check the transmitter in your hand.
Battery Vitality Even if the red light on your remote blinks when you press a button, the battery may not have enough “juice” to send a strong Radio Frequency (RF) signal to the receiver.
- The Pro Tip: Remote receivers require a very specific voltage to trigger the light relay. A weak battery might start the fan (low power command) but fail to trigger the light (high-sensitivity command). Always replace the batteries with fresh alkalines before moving to complex repairs.
Stuck Buttons Dust and skin oils can gum up the buttons on a fan remote. If the “Light” button feels mushy or doesn’t “click” like the “Fan” buttons, the internal contact pad may be dirty.
4. Fix Remote & Receiver Sync (DIP Switch / Pairing)
Ceiling fan remotes work on specific frequencies. Sometimes, a power surge or a neighbor’s new fan can cause your receiver to “lose its place.”
Understanding DIP Switches Older fans use a row of 4 small sliders (DIP switches) inside the battery compartment of the remote and on the side of the receiver in the canopy. These must match perfectly.
- The Sync Fix: If your fan works but the light doesn’t, try changing the DIP switch settings on both the remote and the receiver to a new, identical pattern (e.g., all “Up”). This often clears frequency interference.
Modern Pairing (Learning Mode) Newer fans don’t have switches; they use a “learning” process.
- Turn off the wall switch for 30 seconds.
- Turn the wall switch back on.
- Within 60 seconds, press and hold the “Light” or “Fan Off” button for 5-10 seconds.
- The fan light will usually flash to confirm it has re-paired with the remote.
5. Replace Remote or Receiver Kit
If you have synced the remote and checked the bulbs, but the light is still dead, the receiver is the most likely failure point.
The Relay Failure Inside the receiver (the small black box in the ceiling), there are separate “relays” for the fan and the light. It is extremely common for the light relay to burn out while the fan relay continues to work perfectly. This happens because the light kit often draws more immediate “inrush” current than the motor.
How to Know for Sure If you hear a “click” inside the fan when you press the light button, but no light appears, the relay is trying to work, but the internal connection is broken. If you hear no click at all, the receiver’s light circuit is dead. You can buy a universal remote and receiver kit for about $30 to $50.
6. Check the Wattage Limiter
This is the “secret” component that causes 90% of light failures in fans made after 2005. To comply with federal law, manufacturers install a wattage limiter to prevent you from using high-heat bulbs.
The Failure Mode The limiter is designed to cut power if you use more than 190 watts. However, these devices are notoriously fragile. A power surge or even the slight heat from an LED bulb can cause the limiter to “trip” and never reset.
- Symptoms: The light worked yesterday, but today it is dead, or it flashes once and then stays off.
- The Connection: If your light is out and you previously noticed your ceiling fan wattage limiter was acting up, it has likely finally failed.
The Test If you are comfortable with wiring, you can bypass the limiter (connecting the light wires directly to the receiver) to see if the lights come back on. If they do, the limiter was the problem.
7. Inspect Internal Wiring (Light Kit Only)
A ceiling fan is a moving machine. Over time, the constant rotation and oscillation can cause wires to rub, fray, or pull out of their connectors.
The Blue Wire Connection In the world of ceiling fans, the Blue wire is almost universally the “Hot” wire for the light kit.
- Turn off the breaker.
- Remove the light kit (usually 3 small screws).
- Look for the point where the blue wire from the fan meets the light kit.
- If the wire nut has fallen off or the wire has snapped due to metal fatigue, the light will not work even if the fan is receiving power.
Burnt Connectors Check the plastic “plug” that connects the light kit to the fan body. If you see any melted plastic or brown scorch marks, the connection has shorted out. This can happen if the fan was ceiling fan making noise due to a severe wobble, which puts physical strain on the internal wiring harness.
8. Wall Switch Issues
Sometimes, the problem isn’t in the fan at all—it’s at the wall.
The “Phantom” Wall Dimmer You should never use a wall-mounted dimmer switch to control a fan that has a remote control. The wall dimmer “chops” the electricity, which can starve the remote receiver of the voltage it needs to trigger the light.
- The Fix: Ensure your wall switch is a standard “On/Off” toggle and is turned to the “On” position.
Loose Wall Wiring If the wires behind the wall switch are loose, you might get enough current to run the fan motor but not enough to trigger the sensitive electronics of the light receiver.
9. Faulty Light Kit or LED Driver
Modern fans often don’t have light bulbs at all. Instead, they use an integrated LED “array” or disc.
The Driver Component Integrated LEDs use a “Driver” (a small transformer) to convert AC power to DC. If this driver fails, the LEDs will not light up. Unlike a bulb, you cannot just replace the LED disc; you usually have to replace the entire light kit assembly.
- Diagnosis: If you have a multimeter, check for DC voltage coming out of the driver. If you have 120V AC going in but 0V DC coming out, the driver is dead.
10. When the Motor Works But Light Doesn’t
Why does this happen so frequently? It is because the fan and light are on parallel circuits within the fan.
The Split Flow Think of the power coming into your fan like a Y-shaped pipe. One side of the “Y” goes to the fan motor; the other side goes to the light kit. The remote receiver acts as two separate valves.
- If the “Light Valve” (the light relay) gets stuck shut, the water (electricity) continues to flow to the “Fan Valve” without issue.
- This is why the motor can run perfectly while the light kit remains completely powerless. This is a common design in both AC and DC fans. To learn which one you have, see How to tell if ceiling fan is ac or dc.
Common Scenarios Explained
Scenario A: Light Won’t Turn On But Fan Works
This is almost always a receiver relay failure or a tripped wattage limiter. If you have replaced the bulbs and the batteries, the receiver is the prime suspect.
Scenario B: Light Turns On With Pull Chain But Not Remote
If your fan has both a pull chain and a remote, the pull chain must be in the “On” position for the remote to work. Sometimes a guest or a child will pull the chain, manually cutting the circuit. The remote can’t “override” a physical pull chain that is in the “Off” position.
Scenario C: Light Flashes Then Turns Off
This is the classic signature of the wattage limiter. The limiter senses an over-current (or it is failing) and shuts the light down immediately to prevent heat buildup. You may also see this during a ceiling fan light flickering event.
Safety Tips Before Fixing
Fixing a ceiling fan involves electricity and working at heights. Safety is always non-negotiable.
- Cut the Breaker: Turning off the wall switch is not enough. Capacitors in the remote receiver can store a charge. Always turn off the power at the main breaker panel.
- Use a Non-Contact Voltage Tester: Before touching any wires, use a tester to ensure no current is flowing through the “Blue” or “Black” wires.
- Stabilize Your Ladder: Never stand on the top rung of a ladder. Ensure you have a stable base before reaching for the canopy.
- When to Call a Pro: If you see melted wires, smell “electrical burning,” or if the fan sparked when the light failed, stop your DIY efforts and call a licensed electrician.
When to Replace the Entire Ceiling Fan
There comes a point where repairing an old fan is no longer cost-effective.
- Age: If the fan is more than 15 years old, finding replacement receivers or light kits can be nearly impossible.
- Cumulative Issues: If the light won’t work, and the fan is ceiling fan making noise, and the finish is peeling, the $100 you would spend on a new receiver and light kit is better spent on a modern, energy-efficient fan.
- DC Upgrades: Modern DC motor fans are 70% more efficient and often come with much more reliable integrated light systems.
Final Troubleshooting Checklist
Before you give up, run through this rapid-fire list:
- [ ] Is the wall switch turned ON?
- [ ] Did you replace the remote batteries with fresh ones (not from the junk drawer)?
- [ ] Did you try a bulb from a working lamp?
- [ ] If there is a pull chain, did you pull it once to ensure it’s “On”?
- [ ] Did you hold the “Light” button for 10 seconds to re-sync the remote?
- [ ] Is the “Blue” wire firmly connected inside the switch cup?
FAQ Section
Why does my ceiling fan light not turn on with remote?
The most common cause is a dead battery in the remote or a failed light relay inside the receiver box in the fan’s canopy.
Can a bad receiver stop only the light?
Yes. The receiver has two separate circuits. It is very common for the light circuit to fail while the fan circuit continues to operate.
How do I reset my ceiling fan remote?
Turn off the wall power for 30 seconds, turn it back on, and within one minute, hold the “Light” and “Hi” (or “Fan Off”) buttons simultaneously for 10 seconds.
Is there a fuse in a ceiling fan light?
Not a traditional glass fuse, but most modern fans have a “wattage limiter” that acts as a thermal fuse. If it “blows,” the light will stop working until the limiter is replaced or bypassed.
Can I bypass the remote and use only the pull chains?
Yes. You can remove the receiver and wire the fan directly to the ceiling wires, but you will lose all remote functionality and will have to rely solely on the wall switch and pull chains.
Conclusion
A remote control ceiling fan light not working is a solvable problem that usually boils down to a breakdown in communication between the transmitter and the receiver. With a systematic approach—checking bulbs, syncing frequencies, and inspecting the wattage limiter—you can identify the culprit in under an hour.
Don’t let a dark room ruin your evening comfort. Whether it’s a simple battery swap or a receiver replacement, the path to a bright, quiet home is well within your reach. If your fan is also suffering from other issues, like being ceiling fan lights too dim, address those at the same time to ensure your home comfort system is operating at peak performance for the rest of the year.


