You can save the cost of energy and money by using ceiling fans because they can be used to provide airflow in a room. In fact, in this modern age, most fans are designed to provide efficiency for both seasons including summer and winter to provide warm as well as cool air whenever it is required.
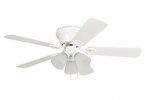
Litex ceiling fans are also designed in a modern way to serve as energy efficient. They are equipped with remote control as well as a standard power switch which is why they are among the top brands of ceiling fans.
Litex fans still use the standard ceiling fan installation process to make the installation process easier for its users.
Litex Ceiling Fan Installation
- Switch off the current to the existing fixture that you are going to replace with the fan. the power can be turned off by accessing the right fuse. Most fuse boxes show instructions to guide the consumers on which fuse to disconnect. Try to switch on the light to ensure that the current is turned off. If you are using open wires rather than light, use a multimeter to check the wires and ensure there is no current flow.
- Remove the screws by unscrewing them holding the existing light fixture and gently taking it down.
- Twist the wire connector to the left and it will disconnect the wires that are reaching the light.
- Get rid of the old electrical box from the ceiling and it can be done by either unscrewing the brace screws or prying it loose with a pry bar if it is nailed.
- Find a circle with a 4-inch diameter following the old hole. Use the drywall saw to cut the hole while having a helping hand to hold a vacuum cleaner attachment beside you to catch the dust.
- Put the new power box through the new hole and use a screwdriver to secure it into the joist. Ensure that there is no give with the electricity box or it will cause the fan to jiggle.
- Pull the available wires through the spaces in the power box.
- Use urethane based adhesive to put a small line on the medallion of the new fan and center the medallion over the new hole. Press it into the place and fix it to the ceiling using four 6d finishing nails. You need to make sure that the nails are driven into the joist beam. Countersink the head of the nails and fill the holes with the help of a spackle.
- From the new ceiling plate, pull the wires and tighten the screws to secure the ceiling plate into place.
- Put all the remaining fan pieces together on the ground and refer to the instructions available in the package.
- Hook up one side of the fan to the ceiling plate and associated the available wires to the wires of the fan. the color of the wires should be the same. Ensure the connectors remain secure in place, and twist the wire connectors to the right. Just keep in mind that the twisting should be done from your hand and do it as hard as possible.
- Use a power screwdriver to attach the fan blades to the motor.
- Turn on the power in order to check the fan.
What’s Next
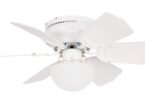
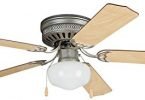
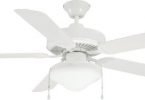
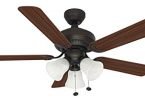
Here is our handpicked selection of Litex.