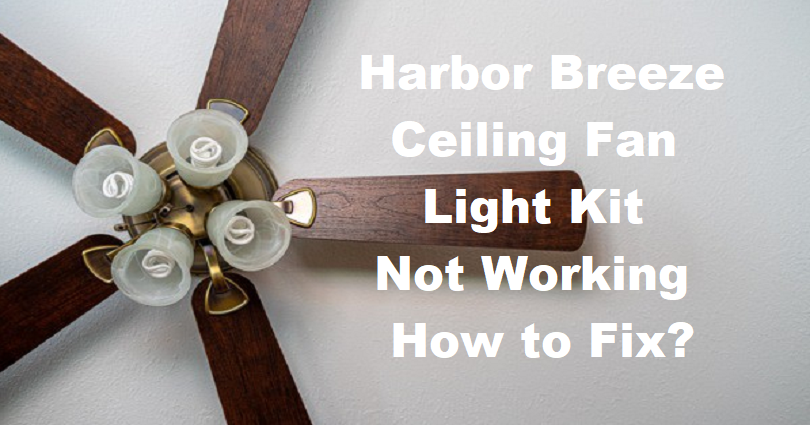
Every ceiling fan at some point will give you a problem and it can be with the Harbor Breeze ceiling fan model itself, or one of the issues one can generally encounter is Harbor Breeze light kit not working even though the ceiling fan is working. We have done a lot of research to gather the information on why your Harbor Breeze light kit is not working and found some solutions and we have given them in this step by step guide.
If your harbor breeze light kit is not working then the first thing you need to do is to check the light bulbs whether they need replacement, check whether the light kit has loose wires connecting it to the housing or check if the light kit needs rewiring.
This is the shorter version of what we have discussed now let’s dig a little deeper to find out each possible situation. But safety first.
It is not recommended to open your Harbor Breeze ceiling fan and light kit by yourself if you do not have any electrical or technical experience. If you must open it up and want to do it yourself then always turn off the power from the circuit breaker.
Contents
Check if the Bulbs Need Replacing
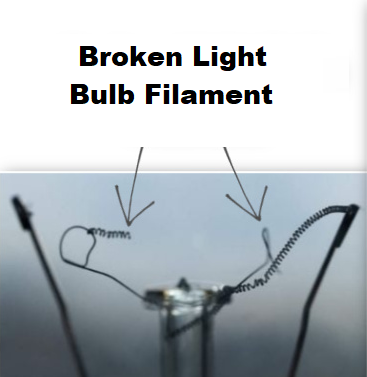
The first task is to check the light bulbs whether they are working or not. They may not appear burned out but when you will examine closely, you may see the broken filament. You may want to change the bulbs with the standard bulbs from online / local stores, we do not recommend it because the ceiling fan light bulbs are designed specifically for fans and are able to withstand the spinning blades and vibrations of the motor.
Tighten Loose Wires Linking Light Kit to Housing
To check the light kit wiring, you need to get access to it. Again, to prevent any issue ensure that you have switched off the power. The pro tip is to check the power is turned off to leave the ceiling fan running at low speed. Approach the breaker box to switch it off, especially the breaker providing current to the unit. After doing so, make sure the ceiling fan has stopped working. If it has stopped turning/spinning, means you have turned off the right breaker. Check for loose wires as well as the connections. You may need new wire nuts to tighten the loose wire connections.
Check If Wires are Burnt Out or Need Replacement
To check if your light kit wires need to be replaced, you need to find the burn marks on the light bulb or socket. The burn marks are a result of a short of the wires. You need to turn off the power from the breaker whenever you try to replace the wires in your ceiling fan. It will be an easier task for you to replace the light kit if you find the burn marks on the socket. Check our article: Harbor Breeze Replacement Light Kits
Check the Light Socket for Corrosion
You need to remove the light bulb to expose the socket before you get started turn off the power from the breaker for your safety.
To expose the socket, first, switch off the power breaker and remove the light bulb. Use a light socket brush carefully to get rid of corrosion. Use a dry cloth to wipe the socket to remove the debris. Return light bulb to socket and ensure that it is tightened properly and do not over tight it.
Examine the Light Socket Metal Tab is Making Contact with Light Bulb
After turning off the power from the breaker, detach the light bulb from the socket. You can use a small flat head screwdriver to pull the metal tab up to make sure that it is making connection with the bulb when the light bulb is screwed in.
Change Damaged Pull Chain
If your ceiling fan has a pull chain, most of the older models have it, you might have to replace the pull chain. Some pullchains will not only toggle the fan off and on and also the lighting. You can find out how to obtain replacement parts on our guide: Harbor Breeze Ceiling Fan Replacement Parts. You can also consult your manual to know how to change your pull chain. The manual may be available on our website as well.
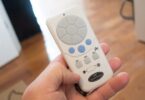
Reset The Harbor Breeze Ceiling Fan Remote Control
If the lights on your Harbor Breeze can be controlled from a remote, you may need to replace the batteries of the remote. Switch off your remote control and add the new batteries after removing the old ones. Wait for 10 or more seconds after changing the batteries.
Make Sure and Check that Power is Reaching the Ceiling Fan
Make sure that the power is reaching the room by checking additional outlets from the same room. If the power sockets in the room are not receiving electricity then check your electrical box and reset the breaker for the room in which you have installed the fan.
Tip: Use gloves when you try to replace bulbs. If you will use bare hands the oil on your hands may remain visible on the bulb and may result in a short out earlier.
We have designed a simple table to guide you on why your Harbor Breeze light kit is not working.
| Fix | Indication |
| Replace Light Bulbs | Shake the bulb to check broken filaments or check the filament if visible. |
| Change Burnt Out Wires | Examine the burn marks on the bulb |
| Tighten any Loose Wires | Examine the loose wires and connections if the wire nuts are loose replace them. |
| Clean Light Socket | Examine Light Socket for Corrosion |
| Lift Light Socket Metal Tab | Check and make sure that Light Socket Metal Tab is touching with Light Bulb |
| Replace Damaged Pull Chain | Find out if there is a Wear on Pull Chain |
| Reset The Harbor Breeze Ceiling Fan Remote Control | Examine the old batteries in the ceiling fan remote control |
| Reset Breaker | Make sure that the Power is Reaching Ceiling Fan |
Before you begin with any electrical work, please take guidance or call a qualified electrician if you are not confident with electrical wiring. It is a wise decision to not to do any electrical work if you are not competent. The information in this article is for information purposes to find out the issue that may be causing your light kit to malfunction.
Why Does My Ceiling Fan Work But the Lights Don’t
It can be irritating for you when you see that the light bulbs are working but they are not functioning in your ceiling fan.
If your ceiling fan works but the lights don’t, then it’s time to find the loose wire connections from the wall switch through the lighting fixture. Broken pull chains with damaged sockets can also restrict the lights and they won’t work, so you have to examine them and change them if damaged.
Use a noncontact voltage meter inside the light socket to determine or check whether the ceiling fan light socket is damaged or not. Switch off the power from the breaker before you begin.
First, remove the light bulb from the socket and hold the volt tester inside the socket. The light on the volt tester will turn on if there is any voltage. If the light remains off on the volt tester, then you can begin to clean the socket.
If you will not turn off the power from the breaker, the volt tester will light up. Therefore, it is necessary to switch off the power from the correct breaker to get started.
A light socket cleaning brush will remove any corrosion that may have there.
Pry up the small metal tab in the socket by using a screwdriver to make sure it is connected to the bulb when the light bulb is installed.
If you are still having issues with the lights not working then you need to check the lighting kit wires or wiring to make sure they are connected securely. Switch off the breaker first to examine the wire connections. Use new wire nuts to tighten the loose connections.
If all of the above methods failed, and your light is still off, then replace your pull chain. Go through the manual to find out the process to change your particular pull chain.
If you are unable to fix the issue, you may need a replacement for your light kit. Related guide on: Harbor Breeze Replacement Parts.
How Do You Troubleshoot a Harbor Breeze Ceiling Fan?
The ideal way of troubleshooting your Harbor Breeze fan is to follow the given steps before doing any repairs.
To troubleshoot your Harbor Breeze ceiling fan, the first thing is to ensure the power is reaching the fan, and ensure that the reversing switch is not in between positions but using either the forward or reverse option. If a fan is creating a groaning sound when spinning then you need to replace the motor.
For this purpose, check the warranty as the motor usually comes with a limited lifetime guarantee and may be changed without any cost. We have covered the warranty information in this article: Harbor Breeze Fan Parts.
If you are looking for installation instructions for your Harbor Breeze fan, check this post on Harbor Breeze Fan Installation.