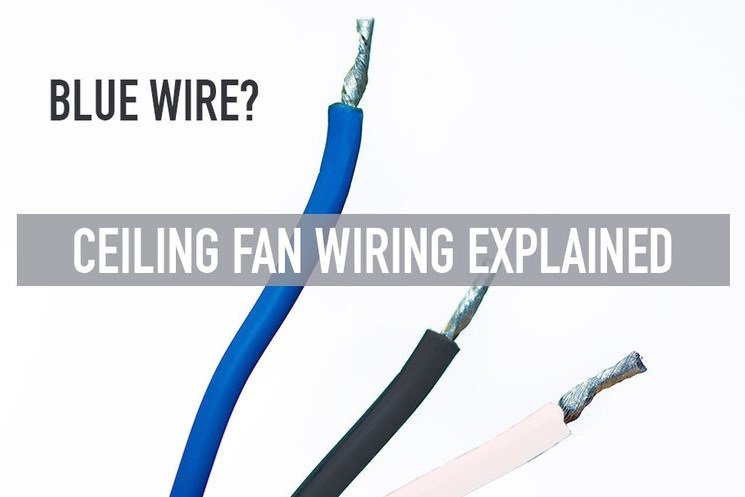
When it comes to wire a new ceiling fan, a number of ceiling fan owners are confused with the single blue wire. It is because the wire does not seem to match with any of the existing ceiling fan wiring. The question arises where does it connect and what is the function of ceiling fan blue wire?
In this post, we are going to give you explanation of the blue ceiling fan wire and the basics of ceiling fan wiring.
Note: If you are not familiar with electrical work or uncomfortable wiring a ceiling fan by yourself, get a professional for this task.
Contents
WHAT IS THE BLUE WIRE ON A CEILING FAN?
The function of the blue wire on a ceiling fan is to control the power going to the light kit. Generally, the black wire on a ceiling fan is reserved for the power of fan only and it does not provide power to a light kit. Controlling the lights on your ceiling fan is not possible without connecting the blue wire on the ceiling fan to a power source.
The confusion occurs due to the fact that the blue wire is not a standard wall wiring color and that is why it does not have a color-match like white and black wires. Why this ceiling fan wire is blue? It is blue to differentiate it from the black wire that controls the fan.
WHERE DOES THE BLUE WIRE GO ON A CEILING FAN?
The location of the blue wire depends on the controls of switches, whether you want to control your ceiling fan with one or two switches. The black ceiling fan wire will be shared with the switch for single switch ceiling fans. When it comes to two separate wall switches, black and blue ceiling fan wires both will be connected to their own separate switches.
We are going to share a diagram below for both scenarios with a general wiring guide. If you are not familiar with the electric wiring, we advise you to get a electrician.
Interesting guide: Hampton Bay Ceiling Fan Wiring with Diagram
Ceiling fan wiring of every brand or model will be different, therefore, we suggest using a manual of that specific ceiling fan before installation.
SINGLE SWITCH CEILING FAN WIRING
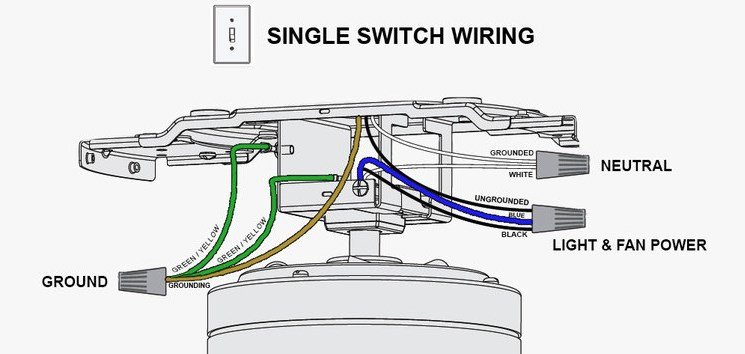
Follow the given diagram below, if your access is only to a single wall switch while installation of the ceiling fan. Note that the black wire is connected to the ceiling fan blue wire to make sure that they can be operated by the same switch.
- Connect the blue wire to both the black ceiling fan wire and the black wire from the ceiling. This connection enables both the ceiling fan and light kit to get the power from a single light switch.
- Grounding wires are to be linked together, these wires are commonly green, yellow in color or bare copper.
- Lastly, the white wires from the ceiling and fan are linked together for connection
DUAL SWITCH CEILING FAN WIRING
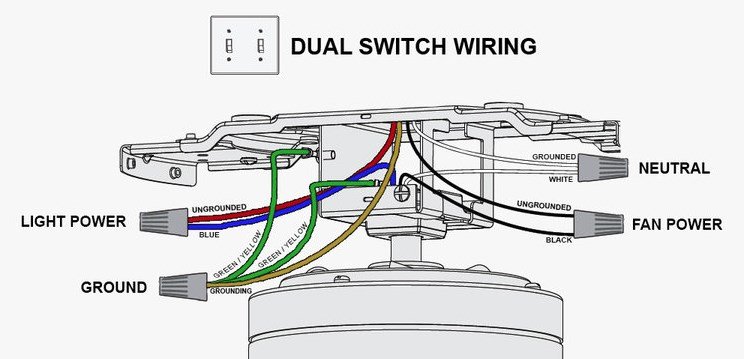
A dual switch setup enables you to control the fan power and light on separate switches. The blue wire on a ceiling fan is linked to its own power switch instead of sharing a switch unlike the single switch wiring setup above. The basic concept is that each switch feeds either the blue wire from the light kit or the black wire for the fan power.
- Firstly, link the black ungrounded wire from the ceiling to the black wire from the ceiling fan. This connection will enable you to control the fan power using the first switch.
- The blue wire from the ceiling fan gets connected to the second live wire from the ceiling. This second wire can be different in color but is most commonly it is available in red or black. This connection enables you to power your lights using the second switch.
- Connect the white grounded wire from the ceiling to the white wire from the fan.
- Finally, ensure all the grounding wires from the ceiling fan and ceiling are linked together. Generally, you will observe 3 grounding wires that may vary in color. The most common grounding wire colors are green, yellow and bare copper.