It is an easy task to install an indoor flush mount ceiling fan. due to the advancement of electric controls along with the updated stronger hanging systems, you can install a ceiling fan without calling a professional. Here are detailed instructions to make sure that you complete this task safely and correctly.
Here is a list of the tools that are required to complete this task:
- Hammer
- Nut driver
- 4-in-1 screwdriver
- Needle-nose pliers
- 2-foot level
- Wrench set
- Tape measure
- Wire stripper/cutter
- Non-contact voltage tester
Ensure the following materials to get started:
- Switch
- Ceiling fan
- Wire connectors
- Fan brace and box assembly
Contents
How to Install a Flush Mount Ceiling Fan (Step by Step Guide)
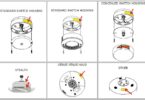
#1: Determine the ceiling slope
Hold a 2-foot level against the ceiling and after that, measure the vertical distance between the ceiling and the level. After getting the number divide it by two in order to get the drop over 12” of horizontal run.
#2: Pound out the old electrical box
Before you start doing it, ensure that the electricity is turned off from the main panel, after that, get rid of the light fixture. Use a hammer and a block of wood, to eliminate the current electrical box free from framing. Pull the electrical cable from the existing box to free it and through the ceiling hole. Keep the old box in the ceiling cavity.
#3: Mount the ceiling brace
The next thing is to insert the fan brace into the hole. Now, press the flat edge of the feet against the ceiling then center the shaft above the hole. To fasten the brace onto the framing, you have to rotate the shaft. Click the metal saddle over the shaft in order to center it over the hole.
#4: Install the new electrical box
Fit the current wire into the cable clamp available at the top of the new metal box. Slide the box above the saddle screws. To secure the box onto the shaft, use a nut driver or a deep-well socket to secure the nuts. Push a loop of grounding wire about 3 quarters around the grounding screw, after that, tighten it.
#5: Attach the hanger bracket
Place the hanger bracket with its opening on the uphill side of the sloped roof. To secure the hanger bracket into the box, use the appropriate screws that came with the fan brace.
#6: Insert the downrod
Keep the motor right side up and then, insert the wire inside the downrod and attach the wire to the mounting collar.
#7: Securely fasten the downrod
Slide the downrod pin through the collar and tube. Lock the pin in place with the help of the cotter pin. After that, tighten the locknuts and screws securely.
#8: Prepare the hanging ball
The first thing is to slide the collar cover next to the canopy over the downrod. Then slip the ball over the down rod and push the pin through the both sets of holes. Next, lift the ball above the pin so it’s above the pin. Finally, tighten the set screw.
#9: Hang the motor
Lift the assembly above the open side of the bracket and then lower it to its place. Then wind the motor so that the ball slot fits snugly into its place that is above the tab on the bracket.
#10: Attach wiring to the fan
Use a wire connector in order to join the bare ground wire from your power supply to the green ground wire on your fan bracket. The white neutral wire should be connected from your fan motor onto the neutral wire from the box. Connect the black and blue wire from the motor to the black hot wire from the box. Fold the wires neatly inside the box.
#11: Attach the ceiling fan blades
Attach the ceiling fan blades to the bracket first then screw the brackets to the bottom of the motor. use a screwdriver to hold the screw in the bracket while you are raising the blade assembly to its position. Now, drive in the screw.
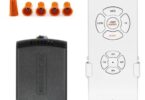
#12: Join the light pod and radio receiver
Attach the pod wires after putting the radio receiver inside the switch housing and it can be done by going through the instructions in the ceiling fan’s manual. Keep in mind the settings available on the receiver’s code toggles so you can dial the similar settings on the electronic control that are available on the wall switch. In the switch housing hub, loosen the screws halfway. Plug in the motor wiring through the receptacle available on the receiver, after that, twist the switch housing into the place on the hub. Then refasten the screws.
#13: Connect the switch
Inspect and if required reset the code toggles on the wall-mounted electronic switch so they are compatible with the ones on the receiver. Get rid of the current wall switch and attach the two black wires on the switch to the wires that were connected to the previous switch with the help of wire connectors. Screw the switch into the box and after that, mount the cover plate.
You may want to remove an old unit first, here is our guide on how to remove a flush mount ceiling fan.