Here is the list of tools you may need to perform the task:
- Screwdriver
- Ladder
Are you shifting your home or adding a new unit to your home, if yes, you may want to remove a flush mount ceiling fan, in this guide, we are going to tell you the right way to do it. Flush mount ceiling fans are easy to remove and it can hardly take an hour to get the job done. Here is the step by step guide to remove a low profile ceiling fan.
Contents
Step 1 – Turn Off the Power
The first step is to turn off the power before you reach the ceiling fan, turn off the circuit breaker that gives current to your ceiling fan you are going to take down. Turn the switch on/off to ensure that the power is off or use the pull chain feature of the fan to know whether it is off or on.
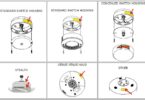
Step 2 – Remove Cover of the Glass Light
Now, it’s time to loosen the three sets of screws carefully. The screws hold the glass dome cover to the ceiling fan base, so you need to be careful and loosen the screws gradually and be ready to catch the glass dome whenever it gets out of the retainer ring. The glass dome will fall and may break or shatter due to your negligence so be careful.
Step 3 – Remove the Light Bulbs
Now detach the light bulbs from the fan light assembly and now set the light bulbs aside.
Step 4 – Remove the Ceiling Fan Blades
Use a screwdriver to unscrew the screws that hold the blades to the ceiling fan base.
Step 5 – Remove the Ceiling Fan Light Kit from Fan
Use a screwdriver to loosen the screws that hold the lighting fixture to the base of fan. Lower the light fixture carefully until you can access the wires that connect the light assembly to the fan.
Step 6 – Disconnect the Light Assembly
Get rid of the wire nuts from the black and white wires that connect the lighting fixture to the power leads of the fan. Do not touch the bare exposed wire ends before you test them using the multi-meter or circuit tester to ensure your safety.
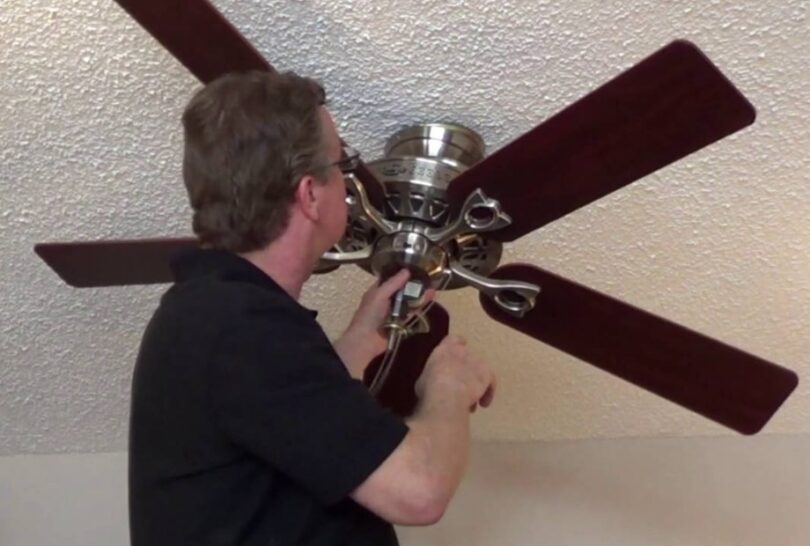
Step 7 – Remove the Fan Motor
It’s time to loosen the screws with a screwdriver that hold the ceiling fan motor to the base amount. Now, rotate the motor of the fan to unlock the base, until the base is unlocked rotate it. It can be lowered from the locking mechanism and in most cases, the homeowners need to remove four screws to perform the task.
Step 8 – Disconnect the Fan Motor
Disconnect the fan motor from the fan switch by removing the wire nuts. Generally, you need to disconnect the blue and black wires to get the job done.
Step 9 – Remove the Ceiling Fan Motor from the Base Mount
Now, remove the motor of the ceiling fan from the base amount hook.
Step 10 – Remove the Mounting Base
Use the screwdriver to unscrew the screws that hold the mounting base for the ceiling fan to the electrical junction box, now gently lower the mounting base until you get access to the wiring assembly.
Step 11 – Disconnect the Ceiling Fan Wiring
Get rid of the wire nuts from the wires that lead from the circuit breaker box to the ceiling fan. After doing that, cap the wires that come from the circuit box with the help of new wire nuts to ensure that they are properly insulated.
Step 12 – Install the New Ceiling Fan after Removing
After removing the flush mount ceiling fan, follow the instruction manual regardless of the company, it will make the installation easy. If you are not installing for now, cover the junction box using a junction box cover until you are ready to install a new flush mount ceiling fan.
What’s next:
After removing it, you may need the installation instructions too, so read our article on How to install a flush mount ceiling fan.
If you want to uninstall a Hampton Bay ceiling fan read our guide here.
Do you want to measure the ceiling fan size before purchasing one, follow this guide to understand how to measure the size?